Login options & identity providers
Each realm decides how its users sign in on the Identity providers tab of the realm detail page. The first row is always Local login — the realm's built-in sign-in surface — followed by the external identity providers connected to the realm.
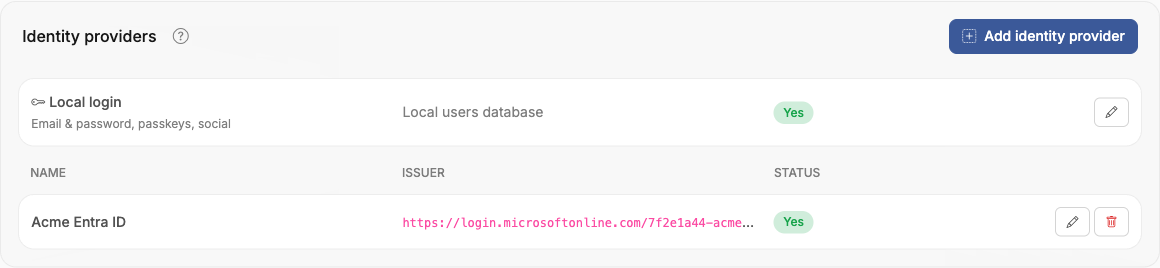
Local login
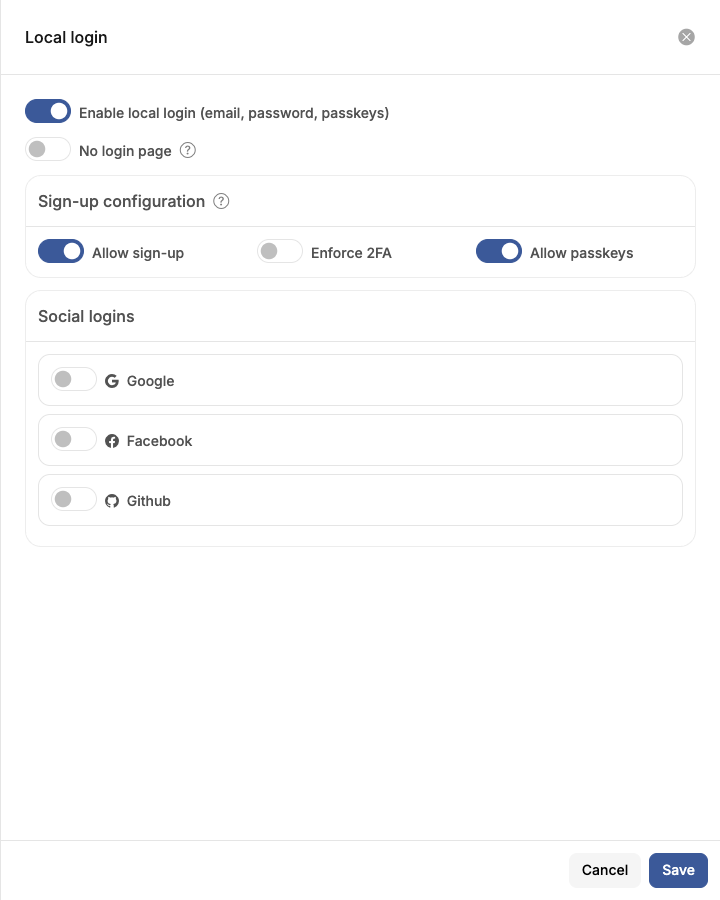
Edit the Local login row to configure the realm's own sign-in surface:
- Enable local login — email & password, passkeys, and social sign-in for accounts kept in this realm. When disabled, users can only sign in through the realm's external identity providers.
- No login page — hides the interactive login page entirely. Sign-in then works only through direct authorization requests — used for broker realms that front other realms (see Linking realms).
- Sign-up configuration — allow self-registration, require two-factor authentication with Enforce 2FA, and offer passkeys with Allow passkeys. New users receive the realm's default role (set on the General tab).
- Social logins — enable Google, Facebook, or GitHub sign-in on this realm's login page.
Require two-factor authentication
With Enforce 2FA on, a user who signs in with a password kept in the realm needs a second factor before OSIE opens a session. A user with an authenticator app enters its 6-digit code after the password. A user without one has to set one up: the sign-in page shows a QR code for the app, and the session opens once the first code from the app is accepted. Cancel returns to the sign-in page without a session. Signing in with a passkey meets the requirement on its own.
The requirement applies from each user's next sign-in, so the realm's existing users set up an app the next time they sign in with a password. It covers platform administrators too when their realm enforces it. Users who sign in through an external identity provider or with Keystone credentials rely on that provider's own checks. While the realm enforces 2FA, a user cannot remove their last authenticator app.
Turn off passkeys
With Allow passkeys off, the realm's sign-in page no longer offers passkey sign-in, the portal stops suggesting a passkey after sign-in, and OSIE refuses passkey sign-in and passkey registration for the realm's users with HTTP 403.
Adding an identity provider
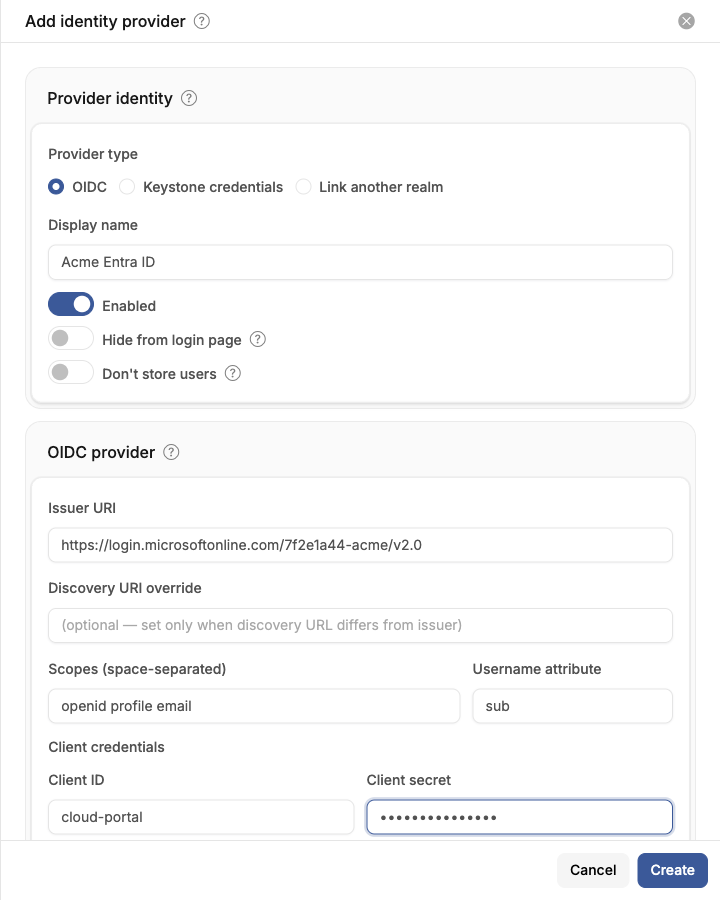
Click Add identity provider and pick the provider type:
- OIDC — delegate sign-in to any OpenID Connect provider (Microsoft Entra ID, Okta, or any other OIDC-compliant server).
- Keystone credentials — authenticate users directly against an OpenStack Keystone backend with their Keystone username and password. Useful when users already exist in Keystone, for example in an LDAP-backed domain. The OpenStack domain is taken from the realm's OpenStack domain access mapping.
- Link another realm — let users of another realm sign in here; used for broker realms (see Linking realms).
Common options for every provider:
- Hide from login page — the provider works through direct authorization but is not offered as a button.
- Don't store users — federate sign-in without persisting a local user record in this realm.
OIDC provider settings
- Issuer URI — the provider's issuer. Endpoints are discovered from it automatically.
- Discovery URI override — set only when the provider's discovery URL differs from the issuer (Microsoft Entra ID is the common case).
- Scopes / Username attribute — the scopes requested and the token claim used as the username (defaults to
sub). - Client ID / Client secret — the credentials OSIE uses at the provider. Register the displayed Redirect URI at your provider; it is one per realm, so all OIDC providers in a realm reuse the same registration URI.
- Use PKCE — send an S256 PKCE challenge on the authorization request; enable only if the provider supports it.
- Authorization request parameters — extra query parameters sent on every authorization request (for example
audience).
Claim mappings
Two kinds of mapping live under Claim mappings, and they do different jobs.
Realm role mappings decide what a federated user may do from their first sign-in. A mapping grants a realm role when an incoming claim carries a given value.
Claim mappings copy an incoming claim onto the tokens the realm issues, so applications behind OSIE can read provider attributes. You choose the name it lands under and whether it goes on the ID token, the access token, or both.
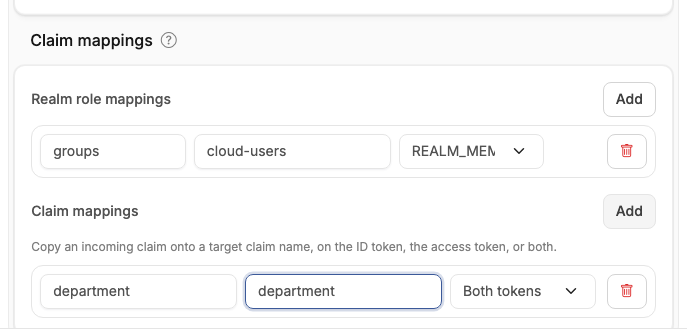
The example above reads a Microsoft Entra ID token:
| Mapping | Effect |
|---|---|
groups contains cloud-users → REALM_MEMBER | Anyone in the cloud-users directory group becomes a realm member, so they can use the realm and create organizations. |
department → department, both tokens | The user's department rides on the tokens OSIE issues, where downstream applications can read it. |
Renaming a claim here renames it only on OSIE's own tokens. OSIE keeps the provider's claims under their
original names as well, which is what
organization group claim rules match — so a rule still looks for groups, never
the target name you introduced.
Realm roles are realm-wide. To put users on individual projects from the same claims, see Project access from identity claims.
The realm login page
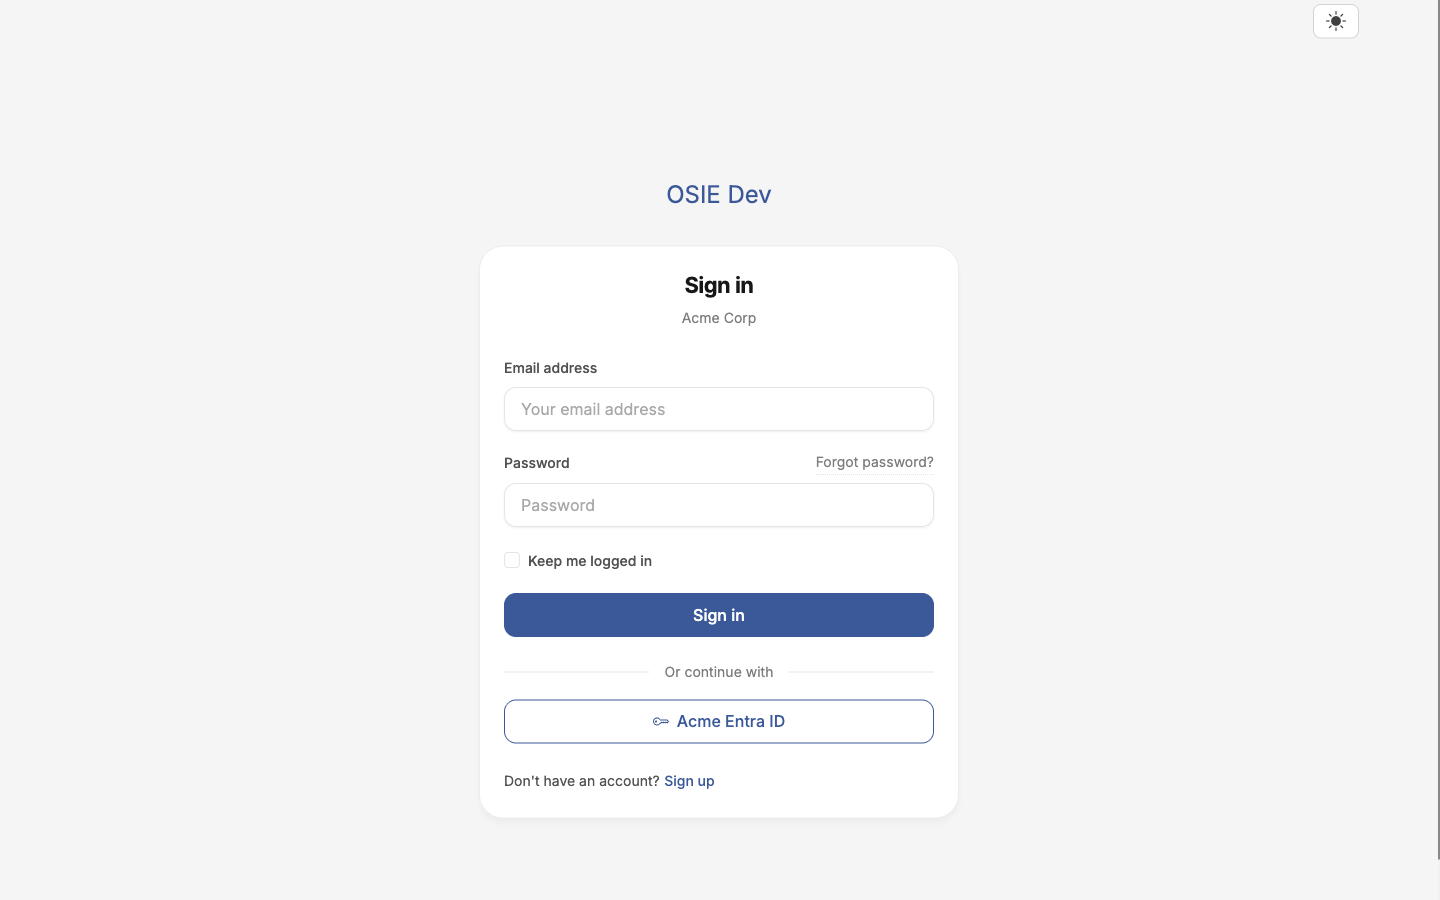
The realm's login page reflects this configuration: local login fields when enabled, one button per visible identity provider, and the sign-up link when registration is allowed.
To send users straight to a provider without showing a form, disable local login and leave a single visible identity provider — the realm's login page then redirects to it immediately.